Skinning PlayBook Components
I've been having a lot of fun with the PlayBook. It's really nice to be using ActionScript 3 to write a “native” application and the QNX components have been really good. One of the things I wanted to do right away was skin them to customize them for the Pintley app I'm building. Luckily, if you've spent any time doing Flash, it's pretty straightforward. The main issue is that the SDK is still fairly new so there were some small things I had to figure out.
Skinning with Images
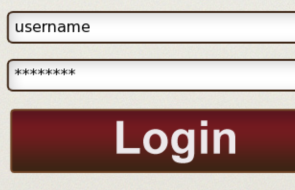
What I wanted to do was skin a TextInput and a Button for my login page. The PlayBook SDK has a few classes that are specifically for skinning, which I was able to check out via the documentation. There's an entire package qnx.ui.skins that has classes for skinning. It looks like, based on this page, that most of the default skins, are images. So I tried that first. What I found helpful was to grab those stock images, bring them into Photoshop, and start tweaking them.
I create three different PNGs for each of the states the TextInput has: up, down, and focus. Once I have those, I embed them in my custom skin class and use the specific QNX APIs to set the look and feel. The class extends the qnx.ui.skins.text.TextInputSkin class, which is the base class for creating a TextInputSkin. Using the attributes on the Embed tag you can set the numbers to make the nine-slice scaling work for your image.
The method to override is the initializeStates method. That's the best place to register properties for states with the QNX component model. Then there are two other methods to use in that method. The first one, setSkinState, just associates a specific skin with a specific state. The last line of code, showSkin, takes a skin class and that's what the component will use as the default skin.

That's pretty much all there is to it. Here's the class:
package com.pintley.skins
{
     import flash.display.Sprite;

     import qnx.ui.skins.SkinStates;
     import qnx.ui.skins.text.TextInputSkin;

     public class PintleyImageTextInputSkin extends TextInputSkin
     {
          protected var upSkin:Sprite;
          protected var downSkin:Sprite;
          protected var focusSkin:Sprite;

          [Embed(source="/assets/skins/TextInputUp.png",
               scaleGridLeft="22",scaleGridRight="350",
               scaleGridTop="18",scaleGridBottom="38")]
          private var UpGraphic:Class;

          [Embed(source="/assets/skins/TextInputDown.png",
               scaleGridLeft="22",scaleGridRight="350",
               scaleGridTop="18",scaleGridBottom="38")]
          private var DownGraphic:Class;

          [Embed(source="/assets/skins/TextInputFocus.png",
               scaleGridLeft="22",scaleGridRight="350",
               scaleGridTop="18",scaleGridBottom="38")]
          private var FocusGraphic:Class;

          public function PintleyImageTextInputSkin()
          {
               super();
          }

          override protected function initializeStates():void
          {
               super.initializeStates();

               // Up State
               upSkin = new UpGraphic();
               setSkinState(SkinStates.UP,upSkin);

               // Down State
               downSkin = new DownGraphic();
               setSkinState(SkinStates.DOWN,downSkin);

               // Focus Skin
               focusSkin = new FocusGraphic();
               setSkinState(SkinStates.FOCUS,focusSkin);

               showSkin(upSkin);
          }
     }
}
Skinning with the Drawing API
Another way to skin the components is using the drawing API. This one is mostly similar to using images with a couple of minor changes. Create the variables in the same way, and override the initializeStates function. Skinning with the drawing API also uses the same methods as the images. setSkinState works the same way and showSkin sets the default skin.
The main difference is that there is an external function in this example, which is where the drawing takes place. Since the different states of the component will look generally the same, I pass in some variables to change the appearance based on which state it's being drawn for. The method gets called in the initializeStates function after the skin sprites are initialized. You could also just do the drawing in the initializeStates method, but this is a bit better in terms of code reuse.
package com.pintley.skins
{
     import flash.display.DisplayObject;
     import flash.display.Sprite;
     import flash.filters.DropShadowFilter;
     import flash.geom.Rectangle;

     import qnx.ui.skins.SkinStates;
     import qnx.ui.skins.text.TextInputSkin;

     public class PintleyTextInput extends TextInputSkin
     {
          protected var upSkin:Sprite;
          protected var downSkin:Sprite;
          protected var focusSkin:Sprite;

          public function PintleyTextInput()
          {
               super();
          }

          protected function drawSprite(item:Sprite,
              lineThickness:int,shadow:Boolean=false):void
          {
               var innerShadow:DropShadowFilter = new DropShadowFilter();
                    innerShadow.distance = 10;
                    innerShadow.angle = 40;
                    innerShadow.strength = .15;
                    innerShadow.blurX = 25;
                    innerShadow.blurY = 25;
                    innerShadow.inner = true;

               item.graphics.beginFill(0xffffff,1);
               item.graphics.lineStyle(lineThickness,0x3c2414,1);
               item.graphics.drawRoundRect(0,0,350,30,5);
               item.graphics.endFill();
               item.filters = [innerShadow];

               if(shadow)
               {
                    var dropShadow:DropShadowFilter = new DropShadowFilter();
                         dropShadow.distance = 0;
                         dropShadow.blurX = 21;
                         dropShadow.blurY = 21;
                         dropShadow.angle = 0;
                         dropShadow.strength = 1;
                         dropShadow.color = 0x3c2414;

                    item.filters = [innerShadow,dropShadow];
               }
          }

          override protected function initializeStates():void
          {
               /**
                * UpSkin
                **/
               upSkin = new Sprite();
               drawSprite(upSkin,2);
               setSkinState(SkinStates.UP, upSkin );

               /**
                * DownSkin
                **/
               downSkin = new Sprite();
               drawSprite(downSkin,3);
               setSkinState(SkinStates.DOWN, downSkin );

               /**
                * FocusSkin
                **/
               focusSkin = new Sprite();
               drawSprite(focusSkin,3,true);
               setSkinState(SkinStates.FOCUS, focusSkin );

               showSkin( upSkin );
          }
     }
}
One last example that I have uses the image method but skins a button instead of the TextInput control. One thing I've noticed about the QNX controls is that some of the components (like TextInput) have their own skin files that can be subclassed, while others, like Buttons, have skins that look like they just subclass UISkin. So instead of calling super.initializeStates() like I did with the TextInput, with the Button, I just override initializeStates() and put the code there.
Update: Thanks to a comment below, I realized that when you extend UISkin, the skinned objects have to be of type DisplayObject, not Sprite.
package com.pintley.skins
{
     import flash.display.DisplayObject;

     import qnx.ui.skins.SkinStates;
     import qnx.ui.skins.UISkin;

     public class LoginButton extends UISkin
     {
          protected var upSkin:DisplayObject;
          protected var downSkin:DisplayObject;
          protected var selectedSkin:DisplayObject;
          protected var disabledSkin:DisplayObject;

          [Embed(source="/assets/skins/LoginButtonUp.png")]
          private var UpGraphic:Class;

          [Embed(source="/assets/skins/LoginButtonSelected.png")]
          private var DownGraphic:Class;

          [Embed(source="/assets/skins/LoginButtonDisabled.png")]
          private var DisabledGraphic:Class;

          public function LoginButton()
          {
               super();
          }

          override protected function initializeStates():void
          {

               // Up State
               upSkin = new UpGraphic();
               setSkinState(SkinStates.UP,upSkin);

               // Down State
               downSkin = new DownGraphic();
               setSkinState(SkinStates.DOWN,downSkin);

               // Selected State
               selectedSkin = new DownGraphic();
               setSkinState(SkinStates.SELECTED,selectedSkin);

               // Disabled Skin
               disabledSkin = new DisabledGraphic();
               setSkinState(SkinStates.DISABLED,disabledSkin);

               showSkin(upSkin);
          }
     }
}
So hopefully that gets you started on skinning. As I get to more complicated components I'll blog about skinning those as well, but the basic premise seems the same across most of the components.
Related posts:
发表评论
 link building[37.233.27.*]2014/7/19 18:17:08#1
rlBSxj I cannot thank you enough for the post.Really thank you! Keep writing.