Progress Indicator - Customizable

Introduction
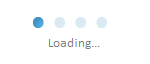
This article demonstrates creating a progress indicator control, usually used in displaying the progress in populating a large numeber of data.
Background
- The key is to create active and inactive images, and to place them appropriately to make it appear animated.
- A timer running in the background updates the position of the active image in a consistent duration.
- Control is designed to be customizable in the designer, and can be shown as a modal dialog at runtime.
- The images are usually of rectangular form and the bacground is ignored by BitMap.MakeTransparent Call.
Using the code
Total number of Images in the ProgressIndicator is controlled by the DotsCount property, A timer running on the background decides which index to be drawn active, and the rest of the indexes are painted inactive.
        void _progressTimer_Tick(object sender, EventArgs e)
        {
            this.ActiveIndex++;

            if (ActiveIndex == this.DotsCount)
                this.ActiveIndex = 0;

            this.Refresh();
        }
And in the paint event Active and InActive images are drwan, each image will be placed at a distance calculated based on width of the control and the images.
            while (iterator < this.DotsCount)
            {
                if (iterator == this.ActiveIndex)
                {
                    e.Graphics.DrawImageUnscaled(this.ActiveImage,new Point(X,Y));
                }
                else
                {
                    e.Graphics.DrawImageUnscaled(this.InActiveImage,new Point(X,Y));
                }
            }
Default Active and InActive images are added to the assembly as embedded resources and populated to the property when the control is instantiated as follows,
            Stream imgStream = Assembly.GetExecutingAssembly().GetManifestResourceStream("Creatives.Resources.ActiveImage.png");
            this._activeDot = Image.FromStream(imgStream);
            (this._activeDot as Bitmap).MakeTransparent(Color.White);

            imgStream = Assembly.GetExecutingAssembly().GetManifestResourceStream("Creatives.Resources.InActiveImage.png");
            this._inactiveDot = Image.FromStream(imgStream);
            (this._inactiveDot as Bitmap).MakeTransparent(Color.White);
When Show method is invoked the control is added to the a WrapperForm and filled to its size and shown as a dialog window.
        public void ShowProgressIndicator()
        {

            this.WrapperForm.Controls.Add(this);
            this.WrapperForm.Size = this.Size;
            this.Dock = DockStyle.Fill;

            this.WrapperForm.ShowDialog();
        }
Points of Interest
Every event hooked must be unhooked to avoid the object being held in memory to avoid memory leaks, and any unmanaged resources being used must be released. protected override void Dispose(bool disposing)
{
if (disposing)
{
_progressTimer.Tick -= new EventHandler(_progressTimer_Tick);
if (_wrapperForm != null)
{
_wrapperForm.Shown -= new EventHandler(wrapperFormShown);
}
}
base.Dispose(disposing);
}
The Wrapper form will not receive mouse activation , and remains on the top of all the other windows, this is done with the help of window styles.
                CreateParams cp = base.CreateParams;

                cp.ExStyle |= /*WS_EX_TOPMOST */0x00000008 | /*WS_EX_NOACTIVATE */0x08000000;

                // Take a look at this link for more window styles
                // http://www.pinvoke.net/default.aspx/Enums/WindowStylesEx.html
Hope this helps you in building a rich user interface, Please do leave your valuable comments and suggestions.
发表评论
 link building[37.233.27.*]2014/7/19 18:17:41#2
bMCi0E Fantastic article.Really thank you! Will read on...
TEaO4o Very good post.Thanks Again. Want more.